
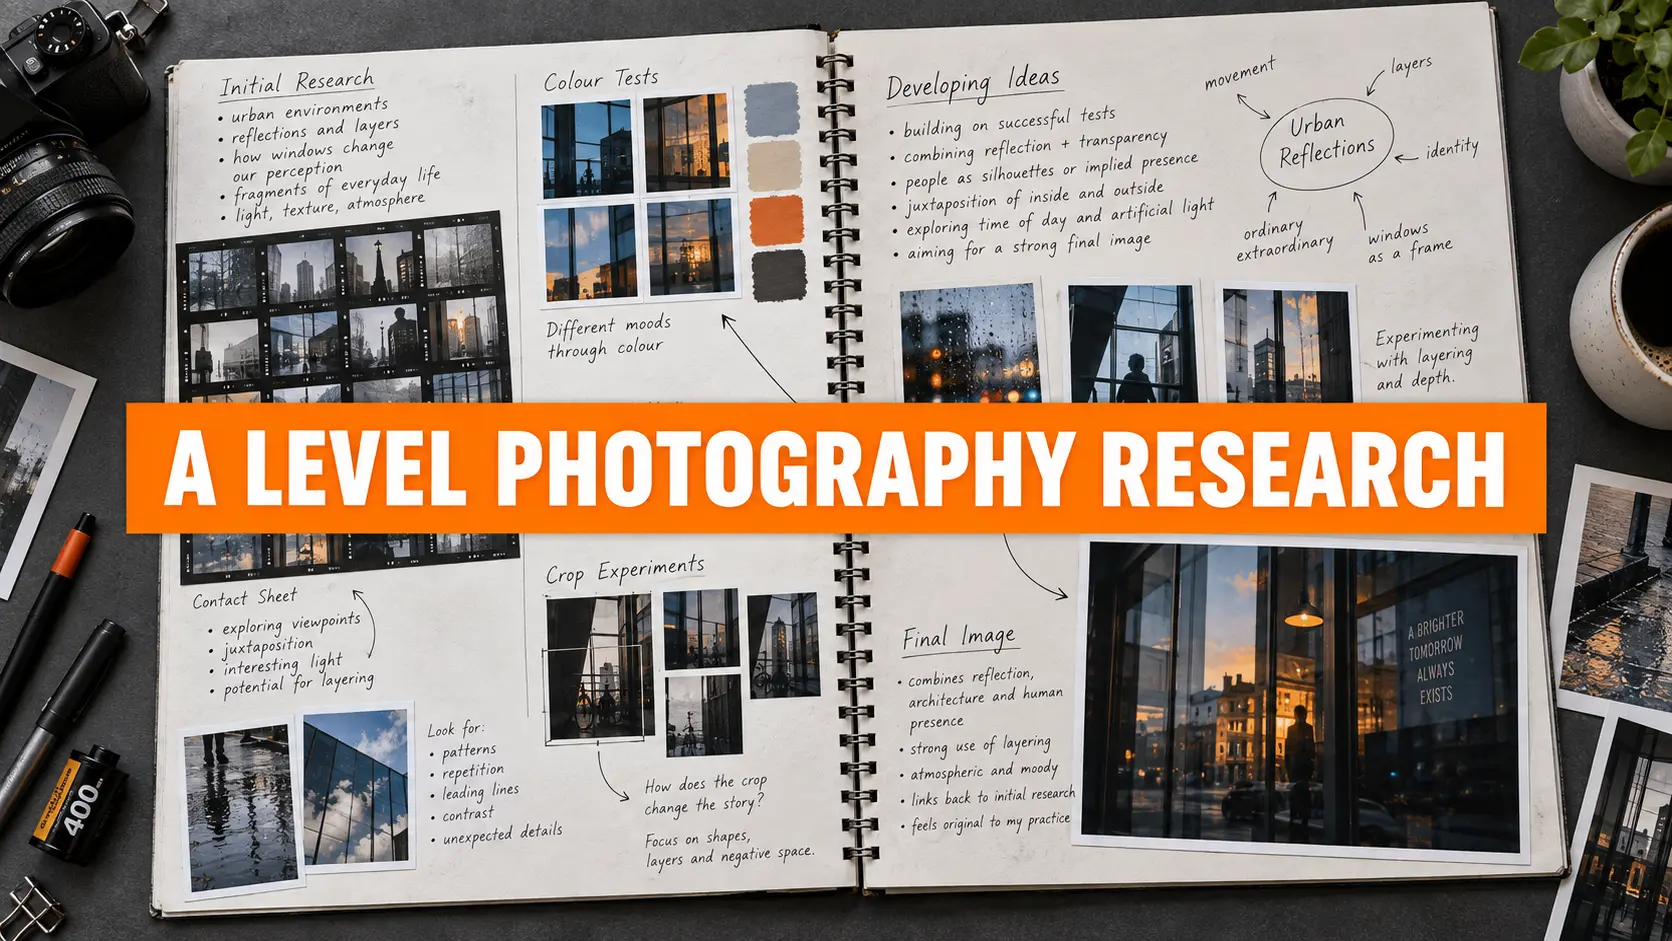
A Level Photography research should help you make better photographs—not simply fill sketchbook pages. The strongest research explains how a photographer creates meaning, identifies ideas or techniques worth testing and then shows how those tests lead towards a personal response. If your practical work looks exactly like the photographer’s, you have stopped at imitation. If it develops through your own subjects, locations, decisions and intentions, the research has done its job.
This guide explains how to analyse photographers, connect contextual research to AO1–AO4 and build original ideas. It is written with OCR A Level Art and Design Photography (H603) in mind, but the practical method is useful for students following other examination boards too.
What does OCR expect from A Level Photography research?
OCR’s A Level Art and Design qualification includes Photography as specialism H603. The Personal Investigation is worth 60% of the A Level and contains a practical portfolio plus a related study. The externally set task is worth 40%. Both components assess the same four Assessment Objectives.
For the Personal Investigation, OCR describes contextual research as part of a portfolio that develops a personal response. The related study must connect to the practical portfolio and is guided to a minimum of 1,000 words. OCR does not prescribe one fixed number of photographers: the important point is that your selection gives you enough breadth to compare relevant approaches and supports your own investigation. You can read OCR’s current explanation of the A Level Art Related Study.
If you need an overview of the whole qualification first, visit A Level Photography Course Explained. For guidance on organising all of your evidence, see What Should Be in an A Level Photography Sketchbook?.
Artist research is not a biography
A short amount of background information can help establish context, but dates, education and exhibition lists do not prove that you understand the photographs. Examiners need to see analytical and critical understanding. That means looking closely, forming judgements and using what you discover to move your practical work forward.
For every photographer you investigate, try to answer five connected questions:
- What do I notice? Identify specific visual features such as framing, focus, viewpoint, lighting, colour, contrast, sequencing, scale or surface.
- How was it achieved? Consider camera settings, lens choice, depth of field, shutter speed, studio or natural light, analogue processes, editing, layering or presentation.
- What does it communicate? Discuss atmosphere, ideas, symbolism, narrative, identity, place, memory or the viewer’s response.
- Why is it relevant to my theme? Make the connection precise. “I like this photographer” is not enough.
- What will I test? Finish with a practical action that changes what you do next.

A simple visual-analysis structure
Start with the evidence in front of you. Avoid claiming that an artist “wanted” the viewer to feel something unless a reliable source supports that statement. It is usually safer—and more analytical—to write: “The restricted depth of field isolates the figure, which makes the scene feel private and uncertain.”
- Subject and context: What has been photographed, where and in what circumstances?
- Composition: Where does your eye go first? What has been cropped, hidden, repeated or placed off-centre?
- Light and colour: Is the light soft, harsh, natural, artificial, warm or cold? How does it affect mood?
- Focus and movement: What is sharp, blurred, frozen or stretched through time?
- Process: What practical or digital choices may have produced the result?
- Meaning: What ideas can the image suggest, and which visual evidence supports your interpretation?
- Personal response: Which element is useful to your project, and how could you transform it through your own subject matter?
This process strengthens AO1, but it should also lead naturally into AO2 experimentation, AO3 recording and AO4 personal response. Research is most convincing when the Assessment Objectives overlap rather than appearing in four disconnected sections.
How to choose photographers who will actually help your project
Choose photographers because they offer contrasting and relevant ways of thinking—not simply because their images are famous or easy to find. A useful group might include one photographer connected to your subject, another whose process could extend your technical skills and a third who challenges how you sequence, edit or present images.
The following photographers offer very different starting points. Use their official websites to research the work accurately and always record the title, date, source and date accessed for any image you reproduce in your sketchbook.
Saul Leiter: colour, obstruction and the overlooked city
The Saul Leiter Foundation presents Leiter’s colour and black-and-white photography. Look at his use of windows, reflections, compressed space, partial views and areas of blur. A student could respond by photographing a familiar journey through steamed glass, rain, shop windows or reflections. The aim would not be to recreate one Leiter photograph; it would be to explore how partially hidden views change your own experience of place.
Alexey Titarenko: time, crowds and long exposure
Alexey Titarenko’s official website includes projects using the city, movement and time. His work can prompt practical tests with slower shutter speeds, tripods, moving figures and repeated visits to one location. Your independent direction might focus on waiting, commuting, isolation or the difference between a fixed building and a constantly moving crowd.
Slinkachu: scale, installation and photographic narrative
Slinkachu’s official website shows miniature figures placed in real urban environments. His work offers a route into constructed photography, scale and storytelling. Rather than borrowing his miniature-street formula directly, you could explore how objects, shadows, projections or staged interventions alter the meaning of a place. This is particularly useful if you enjoy making as well as photographing.
Cig Harvey: colour, symbolism and personal experience
Cig Harvey’s official website is useful for studying carefully controlled colour, poetic sequences and the way ordinary surroundings can carry emotional or symbolic meaning. A response might begin with colour observation and close-up photography, then become a personal series about home, memory, change or a repeated everyday ritual.
Good research does not mean using every technique you find. Compare possibilities, reject the ones that do not serve your intention and explain your choices. Selection is evidence of judgement.
Worked example: from research to an original urban-reflections project
Imagine a student begins with the broad theme Urban Spaces. Their first photographs of buildings are technically competent, but the project is descriptive: it records what the city looks like without communicating a clear idea.
1. Turn the theme into a question
The student notices that windows and puddles sometimes combine two views in one frame. They write: How can reflections show the difference between the city I pass through every day and the way it feels at different times? This question creates a personal purpose and gives the research a job to do.
2. Research for a reason
The student studies how Saul Leiter uses partial views, colour and reflective surfaces, then compares this with Alexey Titarenko’s use of time and blurred movement. Instead of producing two isolated biography pages, they identify three ideas to test: photographing through glass, repeating one location in changing conditions and using movement to suggest time.
3. Plan and complete a first photoshoot
The first shoot should be broad enough to discover possibilities. The student photographs windows, bus shelters, puddles and polished surfaces at several times of day. They vary distance, orientation, viewpoint and focus. They also record camera settings and circumstances so useful results can be repeated.
4. Use the contact sheet to make decisions
A contact sheet is not just a page of thumbnails. The student circles frames where two layers remain readable, crosses out images that are merely confusing and annotates why a low viewpoint gives stronger reflections. Crop, exposure and white-balance tests reveal that restrained colour and slight underexposure support the intended atmosphere.

5. Respond, vary and take creative risks
The student now moves beyond the most obvious research connection. They revisit one personally familiar location in rain, at dusk and after dark. They compare handheld blur with tripod exposures, experiment with reflections at different angles and test subtle layering. Some results fail because the layers compete. Recording that failure matters because the next images show how the composition was simplified.
At this point, the sketchbook should visibly answer the question: What changed because of the research? The answer may be a new way of framing, a technical experiment, a shift in subject, a more precise intention or a different form of presentation.
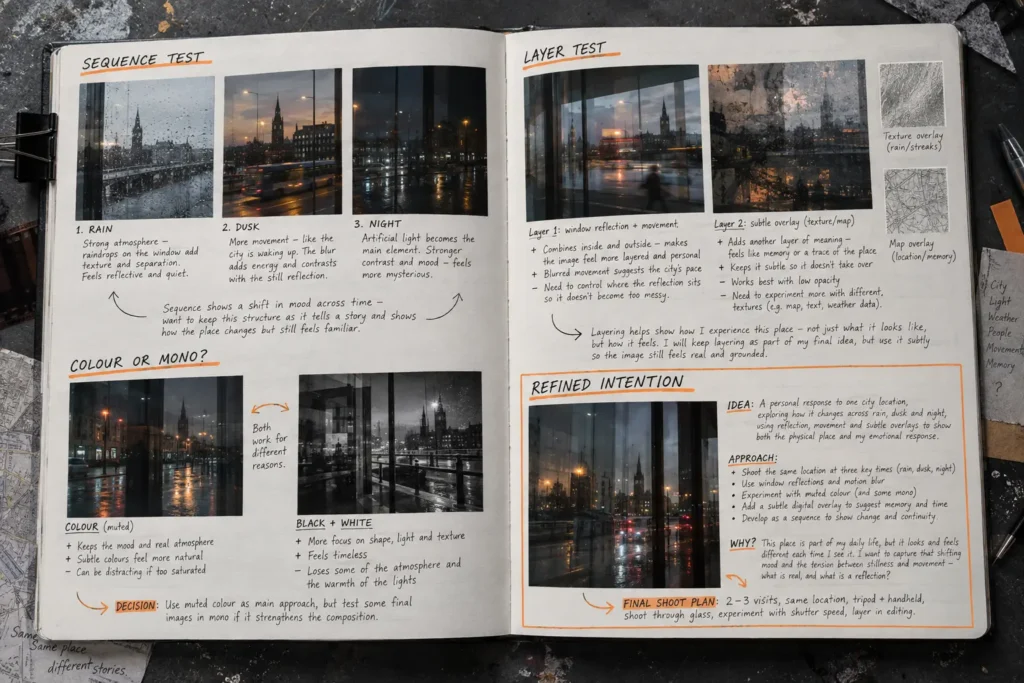
6. Refine the intention and complete the final shoot
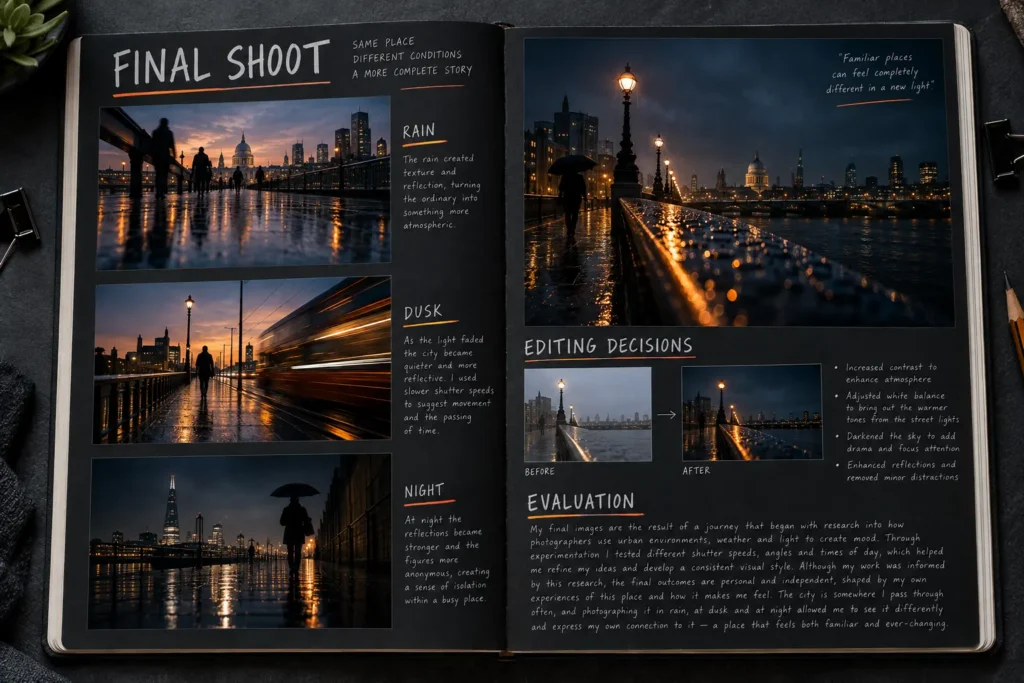
The refined intention becomes: I will photograph one familiar city location in rain, dusk and darkness, using reflections and movement to show how a place can feel both recognisable and uncertain. This is related to the photographers researched, but the location, experience, sequence and meaning now belong to the student.
The final shoot is stronger because it has grown from earlier evidence. The student controls the time of day, weather, position, shutter speed and colour treatment instead of hoping for an accidental success. They select a short sequence rather than one isolated image and evaluate how effectively it communicates the original question.
How the research journey supports AO1–AO4
- AO1—Develop ideas and show critical understanding: relevant photographer research, thoughtful visual analysis, comparison and a clear project intention.
- AO2—Explore and refine: camera tests, lighting trials, alternative processes, editing, presentation experiments and decisions based on results.
- AO3—Record ideas and observations: original photoshoots, contact sheets, technical notes, drawings, location observations and reflective annotation.
- AO4—Present a personal response: a resolved outcome or sequence that connects to the investigation while communicating the student’s own intention.
You can explore the whole journey in How to Present Your Art Sketchbook: The AO1–AO4 Journey, and use the AO1–AO4 Evidence Tracker to check what your portfolio currently shows.
Useful annotation sentence starters
- The first feature I noticed was… because…
- The photographer draws attention to… by using…
- The relationship between the foreground and background suggests…
- The restricted / saturated / contrasting colour palette creates…
- This image is relevant to my investigation because…
- I tested this idea by changing…
- My result differs from the photographer’s work because…
- The most successful test was… because…
- This experiment revealed that…
- For my next shoot, I will keep… but change…
- I rejected… because it weakened…
- My own experience of the subject changes the idea by…
If annotation is a struggle, the free Artist Analysis Worksheet gives you a structured starting point. Use prompts selectively: not every heading will suit every photograph.
Common mistakes that weaken Photography research
- Writing a long biography but analysing only one image in a few vague sentences.
- Choosing a photographer after completing the practical work, so the connection appears artificial.
- Copying one composition, colour treatment or subject without transforming it.
- Using low-quality screenshots without titles, dates or source details.
- Describing what is visible without explaining how visual choices create meaning.
- Presenting experiments without selecting, comparing or evaluating them.
- Researching many photographers superficially instead of using a relevant range in depth.
- Claiming an artist’s intention without evidence from a reliable source.
- Ending the research page without a practical next step.
A Level Photography research checklist
- I have chosen photographers who are genuinely relevant to my theme and intention.
- I have used reliable sources and recorded image titles, dates and website details.
- My pages contain visual analysis, technical consideration and personal interpretation.
- I compare different approaches instead of treating each photographer as an isolated task.
- Every important research page leads to a practical experiment or decision.
- My contact sheets show selection, rejection and clear reasons.
- My later shoots change because of what I learned.
- My work transforms influences through my own subjects, places, processes and meanings.
- The journey from research to final response is easy to follow.
- My related study and practical portfolio connect without repeating the same content.
Frequently asked questions
How many photographers should I research for A Level Photography?
OCR does not set one compulsory number. Choose enough relevant practitioners to give your project breadth and allow meaningful comparison. Quality and practical use matter more than filling pages with many short biographies. Your teacher can advise what is appropriate for the scale of your investigation.
Can I use Pinterest or Instagram for photographer research?
They can help you discover work, but they are not reliable final sources. Trace the image back to the photographer’s official website, a museum, gallery, publisher or reputable interview. Record the correct title, date and source rather than citing a reposted image.
Is it acceptable to copy a photographer’s technique?
Testing a technique can be a useful early experiment, provided you clearly credit the influence. The project must then develop. Change the subject, location, scale, sequence, process, purpose or meaning so that the later work becomes genuinely personal rather than a replica.
Do unsuccessful experiments belong in the sketchbook?
Yes—when they help explain a decision. Select the failures that reveal something useful, annotate why they were unsuccessful and show how the next attempt responds. Repeating the same mistake without reflection does not demonstrate refinement.
Does every photographer need a full sketchbook spread?
No. Give more space to the practitioners who have the greatest effect on your ideas. A concise comparison or targeted technical investigation can be more valuable than a decorative double page with little analysis.
Your next step
Choose one photographer already connected to your project. Select two or three images—not twenty—and analyse one repeated visual decision. Turn that observation into a practical test you can complete this week. Once you have the contact sheet, identify what changed and write the next-shoot instruction before beginning another research page.
For more guidance, visit the A Level Art Help hub or read What Makes an A Level Art Personal Investigation?. If you would like an independent view of how clearly your research, experiments and ideas connect across the portfolio, Portfolio to A Star also offers confidential online feedback.
No responses yet