
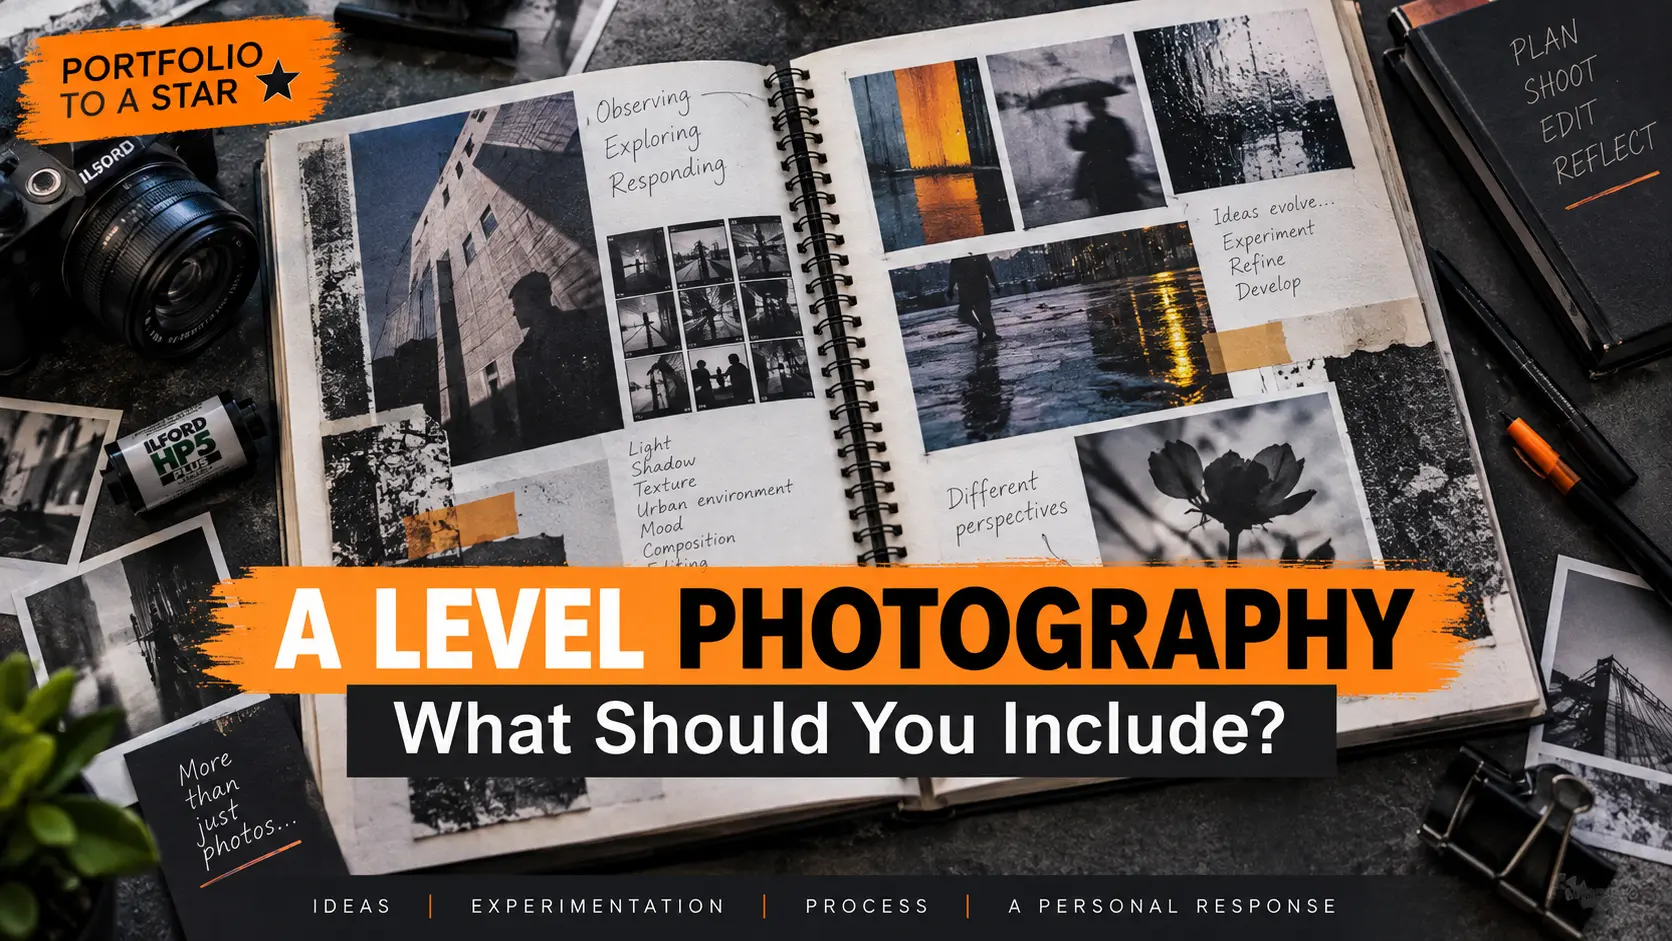
If you are studying A Level Photography, your sketchbook should do much more than simply display your best photographs. It should show how your ideas developed, what you researched, what you tried, what worked, what did not work and what you decided to do next.
A strong A Level Photography sketchbook is a visual record of your thinking. It should help someone looking through your work understand the journey from your first idea to your final photographs or outcome.
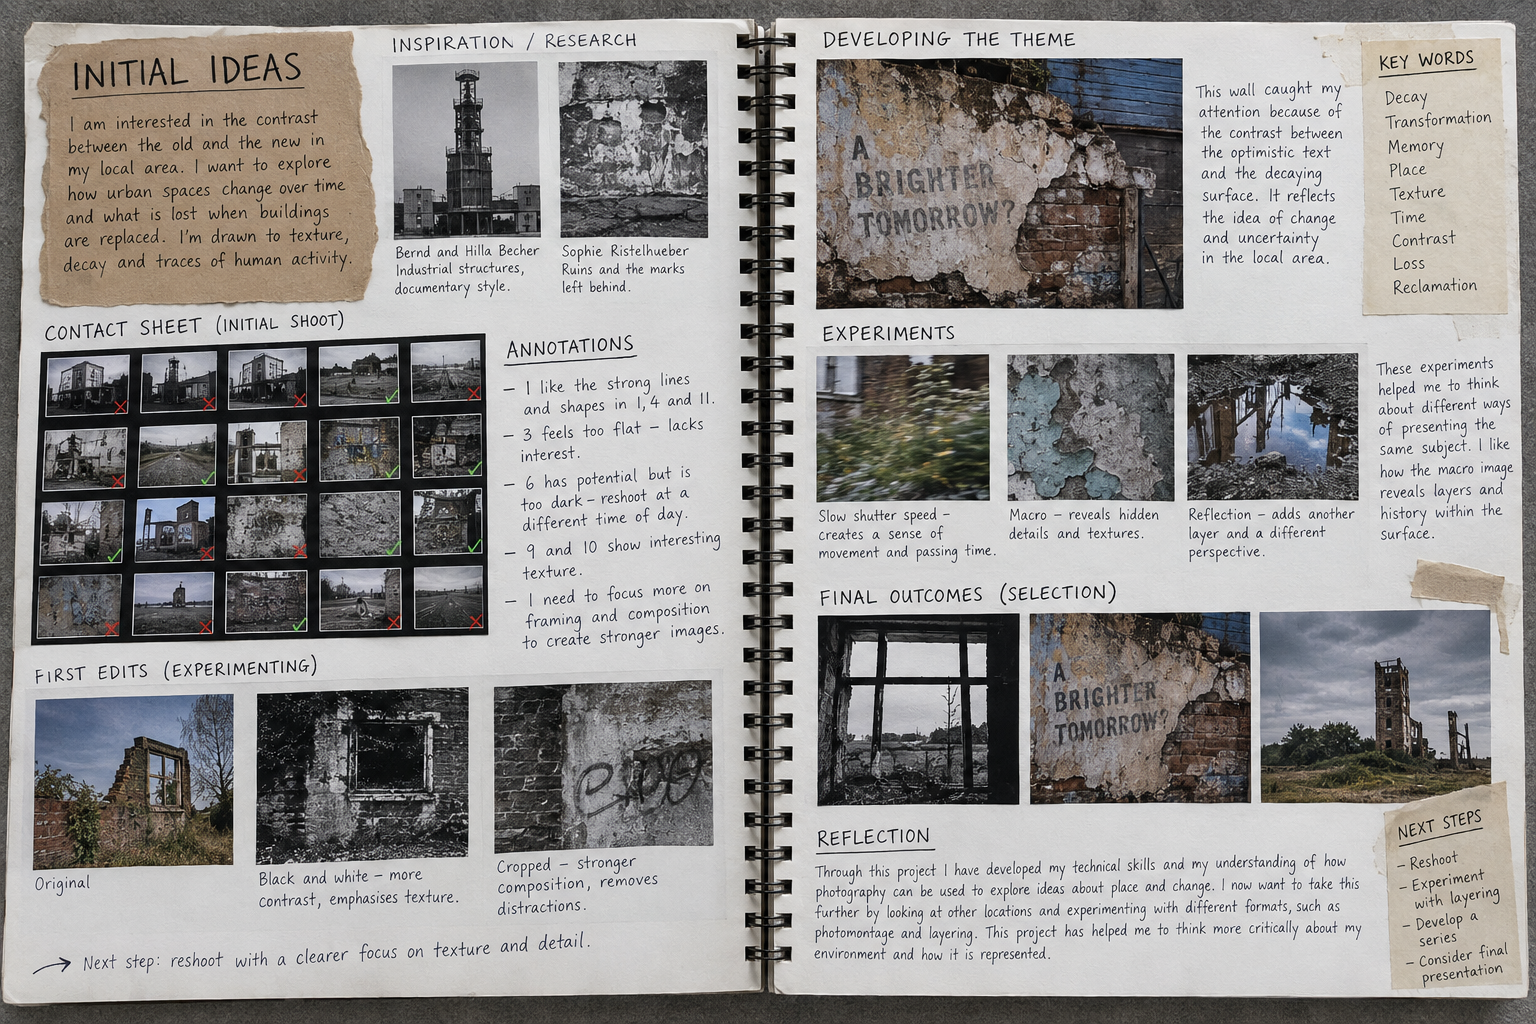
That means including photographer research, contact sheets, photoshoot planning, selected photographs, annotations, editing experiments, technical tests, development shoots, evaluations and evidence of how your ideas changed as the project progressed.
Your photography sketchbook should show a journey
One of the biggest mistakes you can make is treating your sketchbook like a photo album. Attractive finished photographs are useful, but without evidence of where ideas came from and how they developed, much of your creative thinking remains invisible.
- an initial idea
- research into relevant photographers
- a first photoshoot
- a contact sheet
- photographs selected from that shoot
- comments explaining what worked and what did not
- experiments with cropping, colour, exposure or composition
- a second shoot responding to what was learned
- further experimentation
- development towards a more personal outcome
This kind of sequence lets us see you thinking, experimenting and making decisions. That is what you should be aiming for.
1. Start by exploring your theme or idea
Do not feel that you need to know exactly what your final photographs will look like when you begin. Start by exploring possibilities. If your theme were Identity, for example, you might consider portraiture, family, possessions, clothing, reflections, distortion, anonymity, social media, cultural identity or the places people inhabit.
- mind maps
- your own photographs
- thumbnail sketches
- short written ideas
- visual research
- mood boards
- possible locations
- lighting ideas
- questions you want to investigate
Do not worry if some of these ideas eventually disappear. Showing that you considered different possibilities can be useful evidence of your thought process.
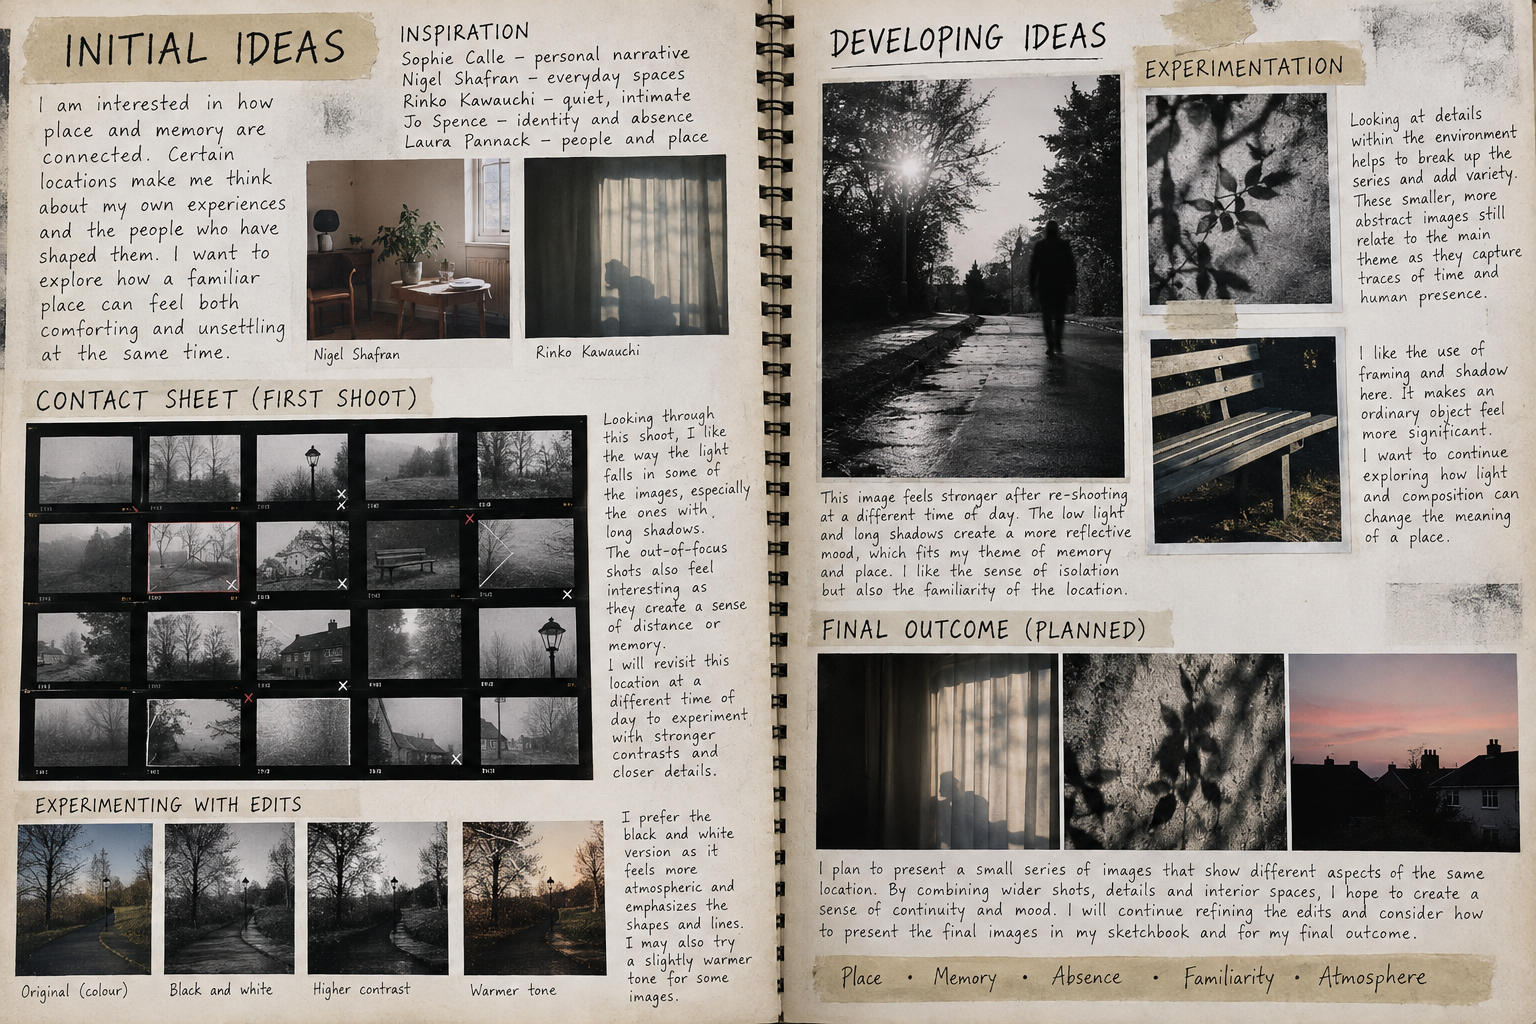
2. Include photographer and contextual research
Photographer research should not just be a biography copied from the internet. Instead, look carefully at the work itself and ask what you can learn from it.
- composition
- lighting
- viewpoint
- colour
- contrast
- depth of field
- movement
- subject matter
- mood and atmosphere
- how the photograph communicates an idea
- what you personally find interesting about it
Most importantly, explain how the research could influence your own work.
I particularly like the way the photographer uses reflections to partially obscure the subject. Rather than simply copying the photograph, I am going to experiment with photographing a figure through windows and reflective surfaces to see whether I can create a similar sense of uncertainty.
The useful part of that annotation is the final sentence: the research has produced a next step. For more help, see our guide to artist research.
3. Plan your photoshoots
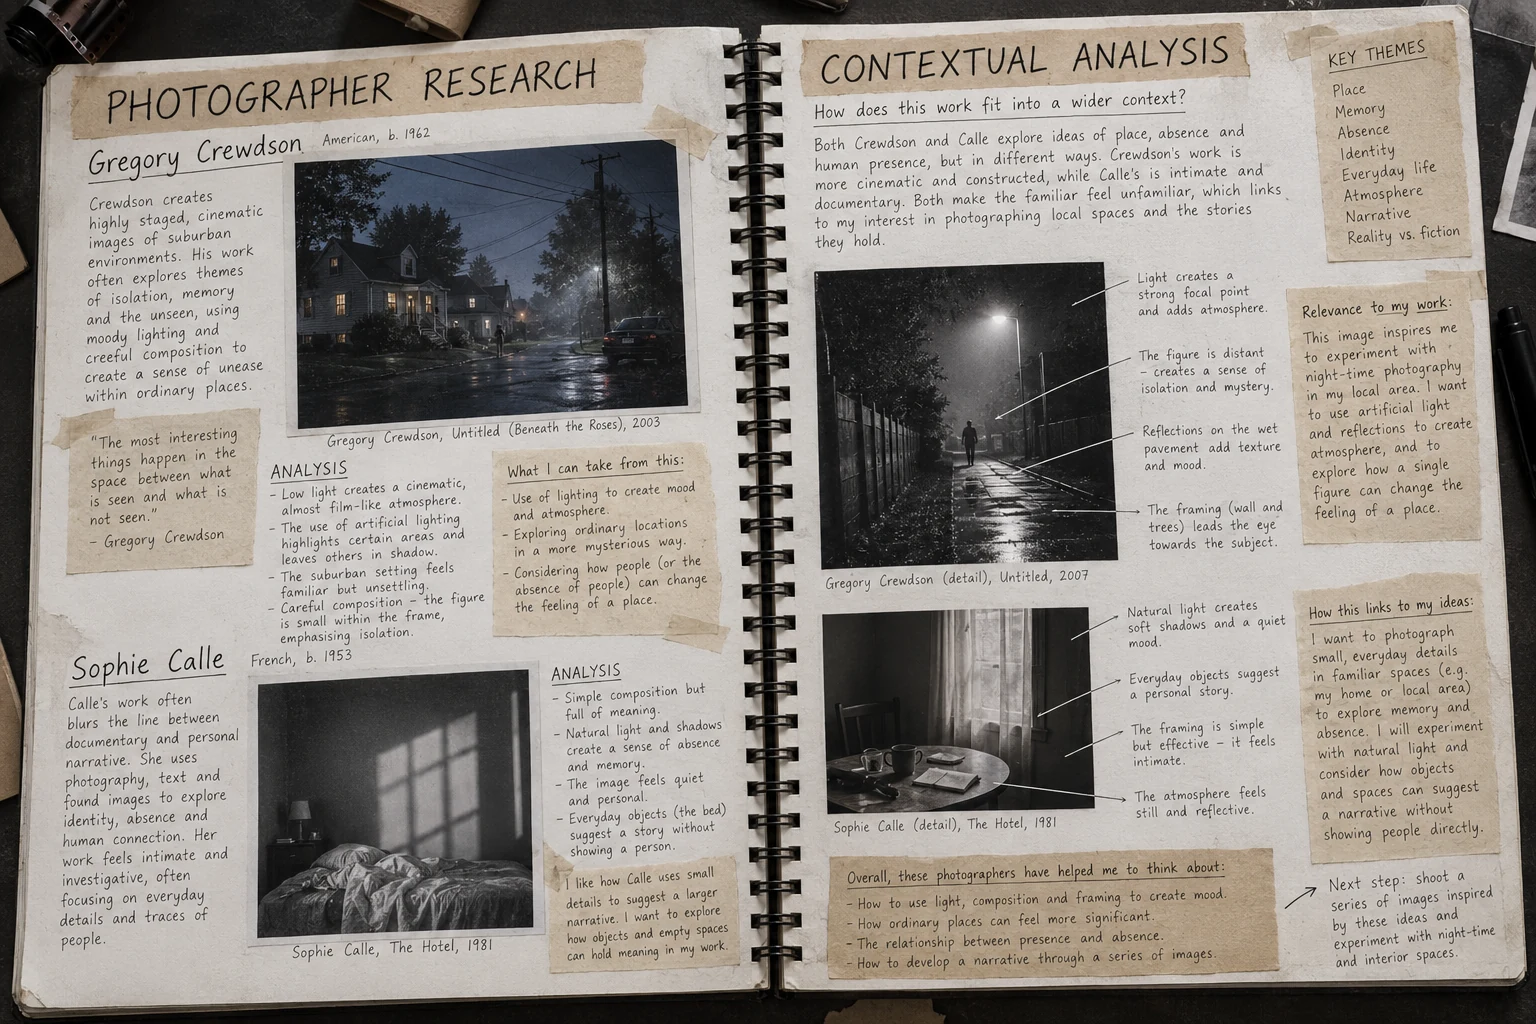
You do not need to write an essay before every shoot, but some evidence of planning helps demonstrate that your photographs were intentional.
- what you intend to photograph
- location
- model or subject
- props
- lighting
- camera settings you want to investigate
- composition ideas
- equipment
- the photographer or research influencing the shoot
A quick lighting diagram, thumbnail drawing or annotated test photograph can sometimes communicate this more effectively than a paragraph of writing.
4. Show your contact sheets
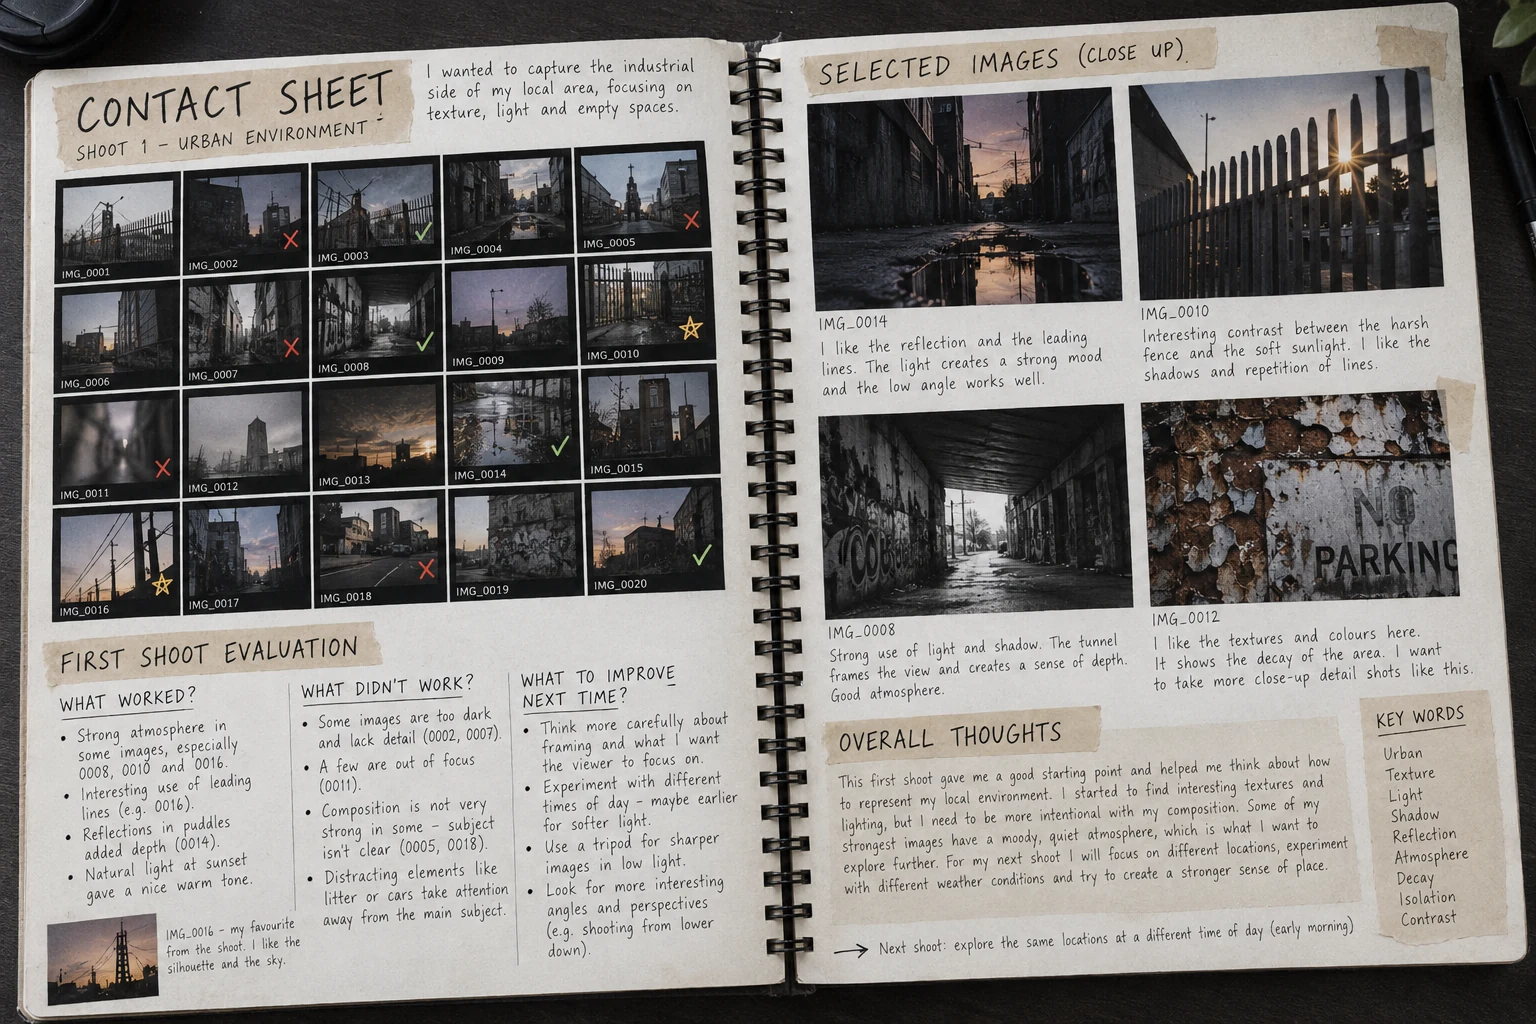
Contact sheets are particularly useful in an A Level Photography sketchbook. They show that you took a range of photographs rather than magically producing one successful image. But do not simply insert a contact sheet and move on: use it to show your decision-making.
Image 17 is the strongest photograph from this shoot because the side lighting reveals more texture and creates greater separation between the subject and background. Image 21 is less successful because the background is distracting. In my next shoot I will use a simpler location and experiment further with directional lighting.
Notice how the evaluation leads somewhere. Your annotation is doing a job rather than merely filling space.
5. Include your strongest photographs at a larger size
Once you have reviewed the contact sheet, give your strongest photographs room to breathe. Display selected images at a larger size so you can examine them properly.
- focus
- exposure
- lighting
- composition
- colour
- viewpoint
- depth of field
- movement
- meaning or atmosphere
Annotation does not have to surround every photograph. Two or three useful comments can tell us much more than a page covered in writing.
6. Show editing and manipulation
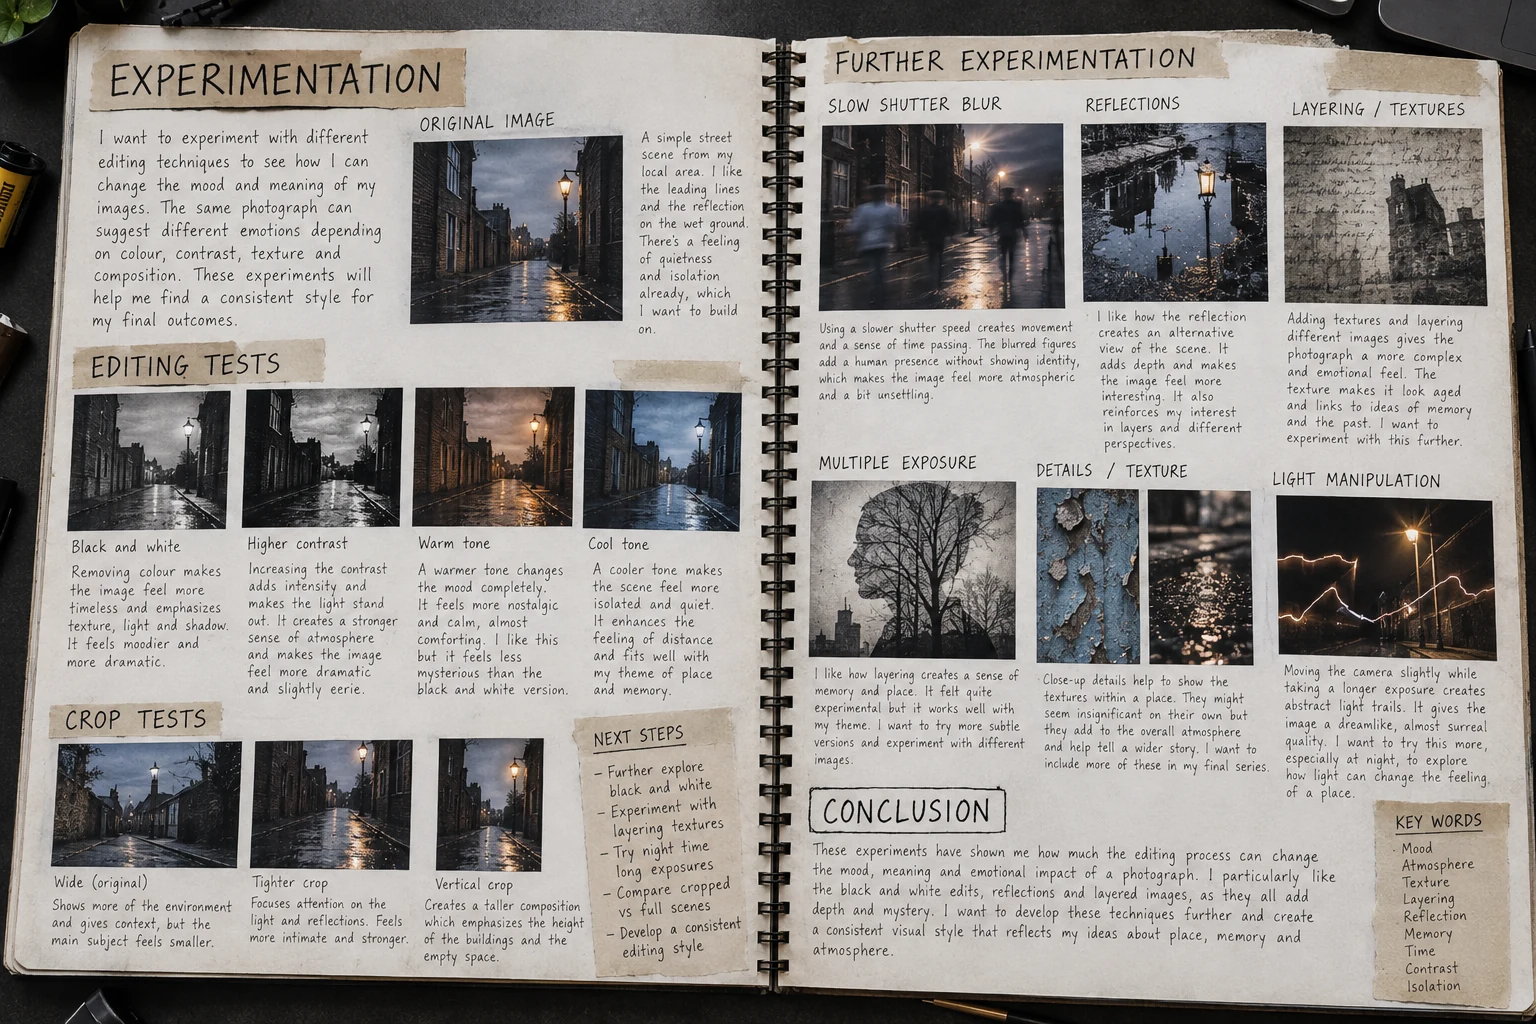
Your first photograph does not necessarily have to be your finished photograph. Show what happens when you experiment with it.
- different crops
- black-and-white conversions
- colour adjustments
- contrast and exposure
- layering and double exposure
- digital collage
- distortion and texture
- photomontage
- alternative printing methods
- physical manipulation of prints
The important thing is not to apply twenty effects simply to prove that you know where the buttons are. Ask yourself: what does this experiment add to my idea?
7. Do not hide experiments that did not work
An unsuccessful experiment is not automatically useless. If it genuinely helped you discover something, it can be an important part of your development.
The amount of movement is too extreme here and I have lost the form of the figure. However, I like the sense of movement it creates. I will repeat the shoot using a slightly faster shutter speed so that some detail remains visible.
Then actually do it. The unsuccessful experiment has now helped move the project forward.
8. Carry out development shoots and reshoots
A strong photography project rarely consists of one photoshoot followed by endless editing of the same images. Use what you have learned to take more photographs.
- location
- lighting
- camera angle
- model
- props
- lens
- shutter speed
- depth of field
- composition
- scale
- time of day
This is where your sketchbook begins to show genuine development: Research → experiment → evaluate → change → photograph again → refine.

9. Make connections between photographers and your own photographs
Do not let your photographer research sit in an isolated section at the beginning of the project and then never mention it again. Return to it. Place your own photographs alongside relevant research where appropriate and explain the connection.
My earlier research made me interested in photographing figures through translucent materials. In this shoot I developed that idea by placing tracing paper between the camera and subject. This softened the facial features while still allowing the figure to remain recognisable.
10. Show evidence of AO1, AO2, AO3 and AO4
Your A Level Photography work is assessed through four Assessment Objectives. Our detailed A Level Art Help section explains these in more depth.
AO1 – Develop ideas
Show how your ideas develop through research and your understanding of relevant photographers, artists and other sources.
AO2 – Explore and refine
Experiment with photographic techniques, processes and media. Review what happens and refine your ideas as the project progresses.
AO3 – Record
Record observations, ideas and insights relevant to your intentions. Your own photographs are obviously extremely important evidence, but drawings, notes, diagrams and other forms of recording can also contribute where appropriate.
AO4 – Present
Develop a personal and meaningful response that connects your intentions with the research, experimentation and development that came before it.
Do I need lots of writing in an A Level Photography sketchbook?
No. More writing does not automatically mean a better sketchbook. Your annotations should explain things that are not already obvious from looking at the photographs.
- why you made a decision
- what you learned
- why you selected a particular photograph
- how research influenced you
- why an experiment succeeded or failed
- what you intend to change next
Instead of writing “I like this photograph because it looks good”, be specific: This composition is more successful because moving the figure away from the centre creates more negative space and makes the image feel less static.
Can an A Level Photography sketchbook be digital?
Yes. Photography naturally lends itself to digital presentation, and students may use digital workbooks, physical sketchbooks or a combination of the two. The format itself is less important than clearly demonstrating research, recording, experimentation, development, refinement and a personal response.
If you work digitally, do not fall into the trap of making every page look like a perfectly polished presentation slide. Your workbook still needs to reveal the process of developing ideas.
What should I avoid?
- pages of photographer biography with little analysis
- huge amounts of writing copied from websites
- contact sheets with no selections or comments
- only displaying successful photographs
- using filters and effects without explaining their purpose
- doing one photoshoot and never reshooting
- research that never influences your own work
- annotations that only describe what we can already see
- deciding on the final outcome too early
- making every page decorative rather than showing genuine development
A simple A Level Photography sketchbook sequence
There is no single correct order, and your project should not become a rigid formula. However, if you are unsure how a project might develop, this is a useful starting structure:
- Introduce and explore the theme.
- Research a relevant photographer or source.
- Analyse what interests you about the work.
- Plan a response or first photoshoot.
- Produce a contact sheet.
- Select and analyse your strongest photographs.
- Experiment with techniques and editing.
- Evaluate what you have discovered.
- Research another relevant influence if appropriate.
- Plan and carry out a development shoot.
- Compare the new results with earlier work.
- Experiment and refine further.
- Develop ideas towards a personal outcome.
- Review the journey and present the resolved work.
The important word here is development. Each stage should give you a reason for the next stage.
Final checklist: what should be in an A Level Photography sketchbook?
- ✓ initial ideas and intentions
- ✓ relevant photographer/contextual research
- ✓ your own photographic responses
- ✓ photoshoot planning where appropriate
- ✓ contact sheets
- ✓ image selection
- ✓ meaningful annotation
- ✓ technical experimentation
- ✓ editing and/or physical experimentation
- ✓ evaluation
- ✓ development shoots and reshoots
- ✓ connections between research and your photography
- ✓ refinement
- ✓ evidence across AO1, AO2, AO3 and AO4
- ✓ a clear journey towards a personal and meaningful response
Need more help with A Level Photography?
If you are still unsure about the course itself, read our A Level Photography course explained guide and explore more A Level Art help across Portfolio to A Star.
If you would like an independent view of your own work, Portfolio to A Star also offers A Level portfolio feedback. Your work can be reviewed against the Assessment Objectives so you can identify strengths, areas that need further development and sensible next steps.
Your sketchbook does not need to be perfect. It needs to make your thinking visible. Show how you explore, question, experiment, change your mind and develop your photography. That is where the really interesting part of an A Level Photography project happens.
No responses yet